Enhanced Article with Engagement Widgets
How Professional Concrete Driveway Installation Works
Site Evaluation and Excavation
Before any concrete arrives, experienced contractors assess your property's drainage patterns, soil composition, and existing grade. They're looking for potential trouble spots—areas where water pools, where tree roots might interfere, or where the soil compresses unevenly.
This evaluation determines how deep they'll excavate and what base materials the site needs.
Excavation removes topsoil, old pavement, and anything organic that will decompose and settle. For a standard driveway in the Fox Valley, contractors typically dig down 10 to 14 inches below the finished grade—enough room for a proper base and the concrete slab itself. The excavation extends slightly beyond the driveway's footprint to accommodate forms and allow for proper edge support.
Proper grading during excavation creates the foundation for drainage. Your contractor should slope the excavated area away from your garage and home, typically at least a quarter-inch drop per foot.
Get this wrong at the excavation stage, and no amount of surface finishing will prevent water from pooling against your foundation.
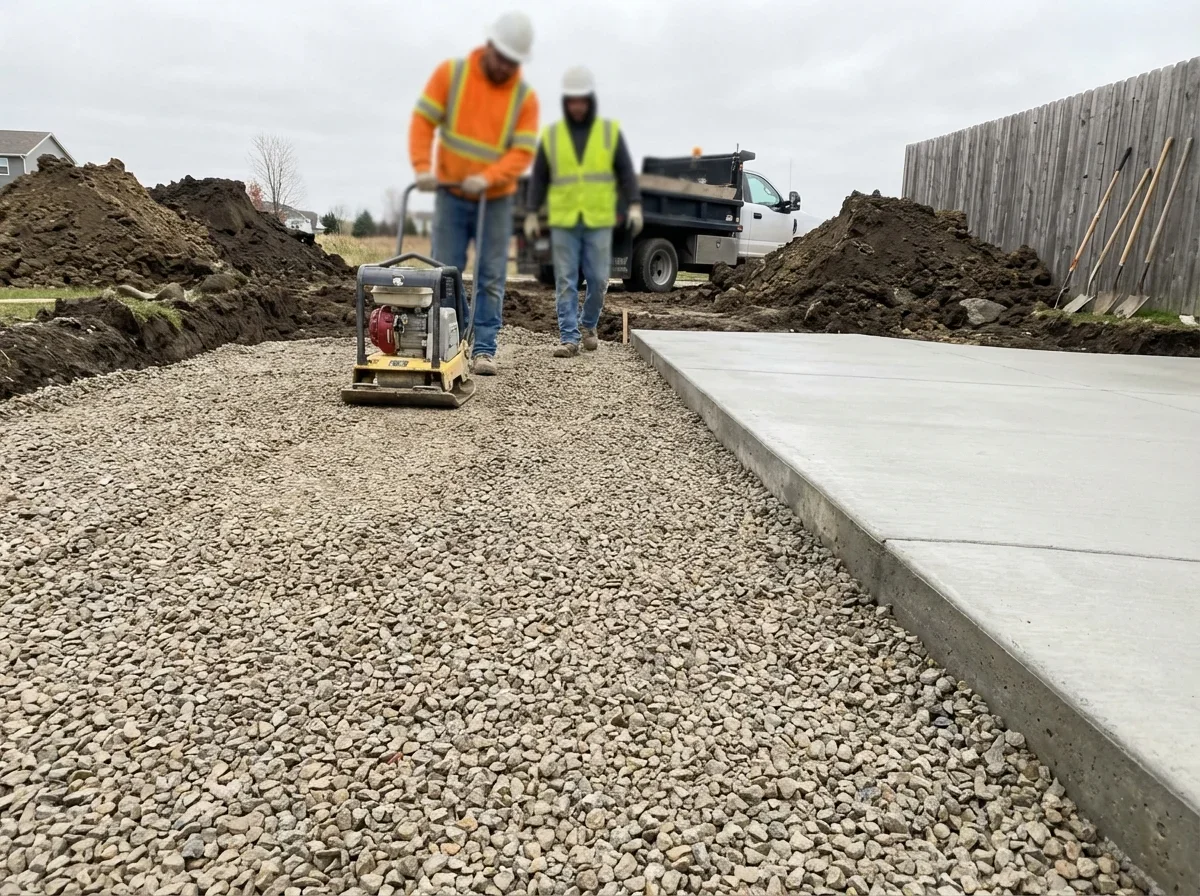
Base Preparation and Compaction
The base layer is what keeps your driveway stable when Wisconsin's freeze-thaw cycles go to work. Professional contractors place 6 to 8 inches of compacted gravel—usually class 5 or similar aggregate—over the excavated subgrade. This aggregate base provides a stable platform that won't shift with seasonal ground movement and allows water to drain away from the concrete surface.
Compaction matters more than the material itself.
Contractors use a plate compactor or roller to compress the aggregate in layers, typically 2 to 3 inches at a time. Each layer gets multiple passes until the material barely moves under the compactor's weight. Skipping this step or doing it half-heartedly leads to settling, which causes cracking even if the concrete itself is perfect.
In areas with poor drainage or clay soil—common throughout the region—quality contractors may add a geotextile fabric beneath the aggregate. This fabric prevents the base material from mixing with the subgrade soil, maintaining the drainage capacity you need. An extra cost that many homeowners don't see budgeted, but it prevents expensive repairs down the road.
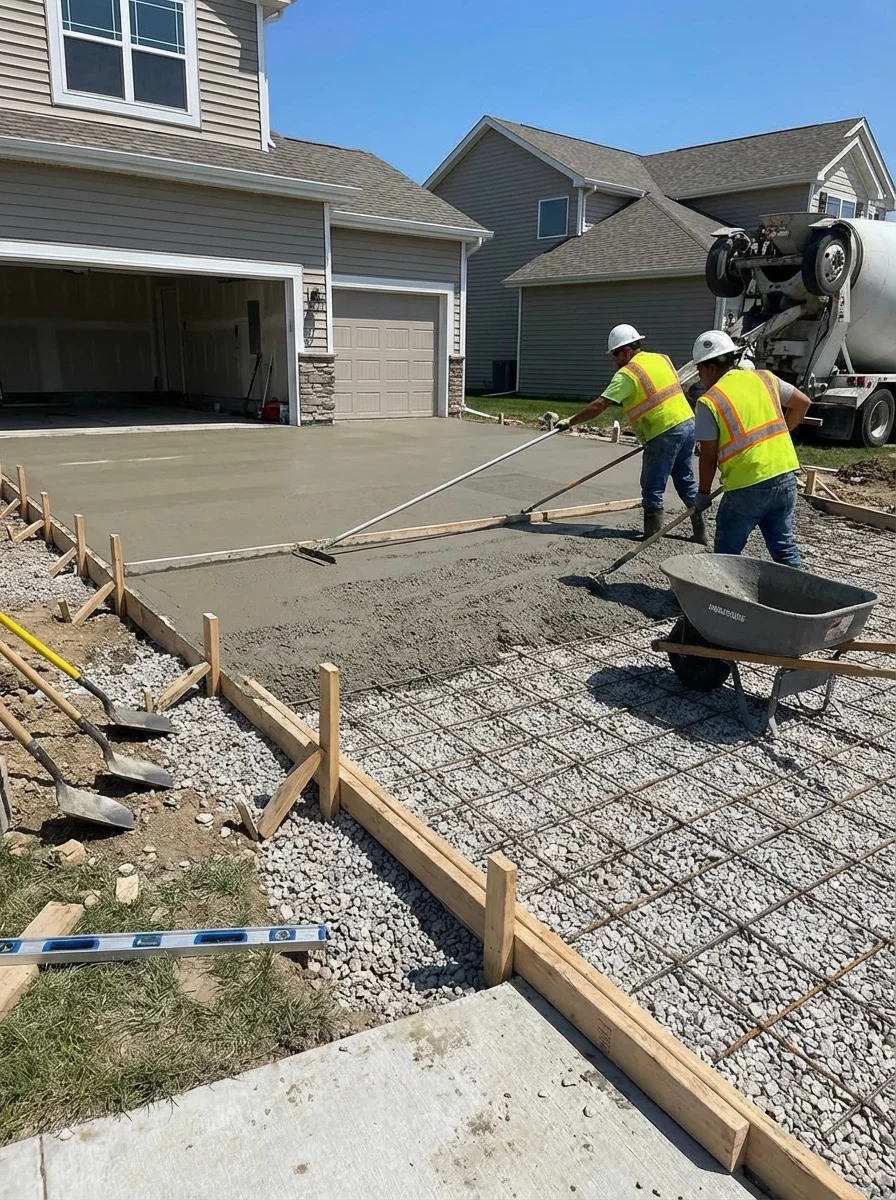
Forming, Reinforcement, and Pouring
Forms create the shape and contain the concrete during the pour. Contractors use dimensional lumber or metal forms, staking and bracing them every few feet so they won't bow under the pressure of wet concrete. The forms also establish the finished height and slope. Wisconsin DOT standards require forms to be securely staked, braced, and oiled before concrete placement begins.[1]
Before pouring, contractors place reinforcement—usually steel mesh or fiber additives mixed into the concrete itself. Wire mesh gets positioned in the middle third of the slab's depth (not laying on the base), often supported on small chairs to hold it in place as concrete flows around it.
Fiber reinforcement distributes throughout the mix and helps control the tiny cracks that form as concrete cures.
Expansion joints go in before the pour as well. Wisconsin code requires half-inch-wide expansion joint filler between your driveway and any existing concrete surfaces like sidewalks, curbs, or garage floors.[1] These joints accommodate expansion and contraction without transferring stress that causes cracking.
The pour itself happens quickly once it starts. Contractors spread the concrete with rakes and shovels, working it into corners and edges before screeding the surface level with the forms. A bull float smooths the surface and brings up a thin layer of mortar for easier finishing.
The entire pour needs to happen in one continuous operation—stopping midway creates cold joints that become weak spots.
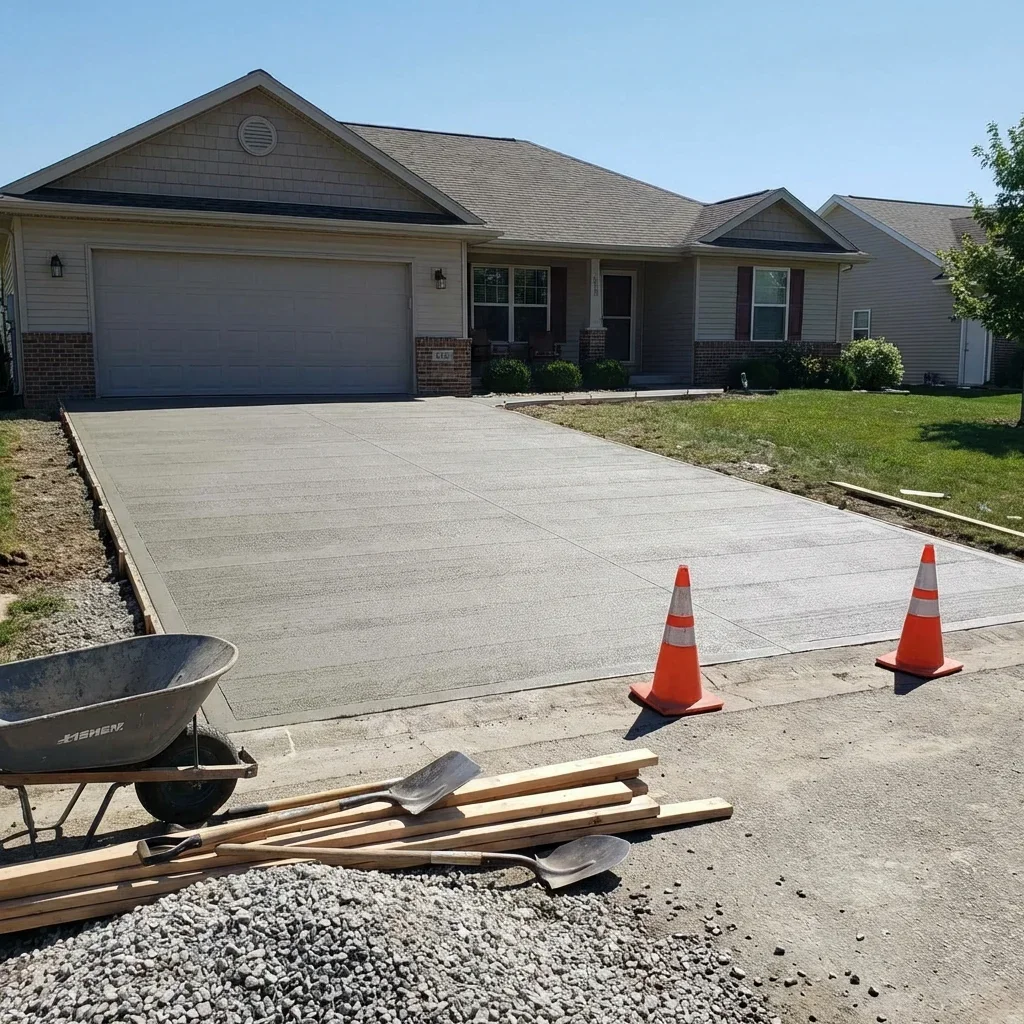
Finishing Techniques Contractors Use
After floating, contractors wait for the concrete to lose its sheen before applying the final finish. Start too early, and you'll bring too much water to the surface, weakening the concrete. Wait too long, and the surface becomes too hard to work.
Experienced finishers know exactly when conditions are right.
A broom finish remains the most practical choice for driveways. After troweling the surface smooth, contractors drag a stiff broom across it to create texture that provides traction when wet or icy. Wisconsin standards specify finishing concrete by brushing or light brooming before the mortar sets.[1] This simple finish is durable, low-maintenance, and costs less than decorative alternatives.
Stamped concrete and exposed aggregate create more visual interest but add complexity. Stamped finishes require applying color hardeners, pressing patterns into the surface at precisely the right moment, and sealing once cured. Exposed aggregate involves washing away the surface mortar to reveal the stones beneath—timing is critical here too. These finishes look impressive but demand more skill to execute correctly and typically need resealing every few years to maintain their appearance.
| Finish Type | Cost Premium | Maintenance | Traction | Longevity |
|---|---|---|---|---|
| Broom Finish | Standard | Minimal—occasional cleaning | Excellent when wet/icy | 20-30 years with proper care |
| Stamped Concrete | +$3-8/sq ft | Resealing every 2-3 years | Good (varies by pattern) | 15-25 years if maintained |
| Exposed Aggregate | +$2-5/sq ft | Resealing every 3-4 years | Excellent slip resistance | 20-30 years with sealing |
What Concrete Mix Should Your Contractor Use?
Not all concrete mixes perform equally under Wisconsin's climate demands. Your contractor should specify a minimum 3000 PSI mix for residential driveways, with many opting for 4000 PSI for better durability.
The PSI rating measures compressive strength—higher numbers mean the concrete can support more weight before failing.
The mix design matters beyond just strength. Air entrainment is essential for freeze-thaw resistance. This admixture creates microscopic air bubbles throughout the concrete that give water room to expand when it freezes, preventing the internal pressure that causes spalling and surface deterioration. Aim for 5 to 7 percent air content in the mix.
Slump measures the concrete's consistency and workability—how wet the mix is when it arrives. A 4 to 5 inch slump works well for driveway pours, providing enough flow to work easily without being so wet that it weakens the finished product. Some contractors ask for wetter mixes because they're easier to place, but excess water compromises strength and durability.
Don't let your contractor add water at the site to make placement easier.
Fiber reinforcement mixed into the concrete helps control plastic shrinkage cracks—those hairline cracks that can appear within hours of finishing. Polypropylene or nylon fibers distribute throughout the mix and provide secondary reinforcement that works with (not instead of) wire mesh or rebar. An inexpensive addition that improves performance.
Why Base Preparation Matters in Wisconsin
Fox Valley soils present specific challenges that make base preparation critical. Many areas have clay-heavy soils that expand when wet and contract when dry, creating movement that concrete can't tolerate. A properly designed and compacted aggregate base insulates your driveway from this movement, providing a stable platform that doesn't heave or settle with seasonal changes.
Wisconsin's frost depth—the depth to which ground freezes in winter—reaches 48 inches in most of the region. While your driveway base doesn't need to extend below the frost line (that's only required for foundations), the freeze-thaw cycling at shallower depths still causes problems.
The aggregate base allows water to drain away before it freezes, reducing frost heaving that would crack or lift sections of concrete.
Proper base thickness and compaction also distributes the load from vehicles crossing the driveway. Without adequate support, concentrated loads from heavy vehicles create pressure points that crack concrete from below. This is why you'll sometimes see driveways that fail near the street or at the garage entrance—these high-traffic areas need the same quality base as the rest of the slab, but they're the first places corner-cutting becomes visible.
Some contractors try to save money by reducing base depth or skipping compaction steps. You might not notice the difference for a year or two, but settlement and cracking are inevitable.
The cost difference between a 4-inch base and a proper 6 to 8-inch compacted base is minimal compared to the replacement cost when the driveway fails prematurely.
Curing Process and Timeline Expectations
Curing isn't just waiting for concrete to dry—it's an active process that determines the concrete's final strength and durability. Concrete gains strength through hydration, a chemical reaction between cement and water that continues for weeks after pouring. The Wisconsin Ready Mixed Concrete Association emphasizes proper curing as one of six essential steps for quality installation.[2]
Professional contractors keep the concrete surface moist for at least seven days after pouring. They might spray a curing compound immediately after finishing, cover the surface with plastic sheeting, or periodically wet the surface with a fine spray.
This moisture retention allows the hydration reaction to continue, letting the concrete develop its full strength potential.
Concrete that dries too quickly never reaches its design strength and remains more susceptible to cracking and surface deterioration.
You can walk on the driveway within 24 to 48 hours, but driving on it requires patience. Most contractors recommend waiting at least seven days before driving on new concrete, with some suggesting 10 to 14 days for the initial cure. Heavy vehicles like moving trucks should wait even longer—ideally 28 days when concrete reaches approximately 90 percent of its ultimate strength. Driving on concrete before it's ready can cause surface damage and internal microcracking that weakens the entire slab.
Temperature affects curing time significantly. Concrete poured in hot weather cures faster on the surface but needs extra attention to prevent rapid moisture loss. Cold weather slows the curing process—contractors may need insulated blankets or heated enclosures if temperatures drop near freezing.
Most contractors avoid pouring concrete when overnight temperatures will dip below 40°F within the first week or when daytime highs stay below 50°F.
Concrete Driveway Use Timeline:
- 24-48 hours — Safe for foot traffic
- 7 days — Minimum wait for passenger vehicles
- 10-14 days — Recommended for regular vehicle use
- 28 days — Full strength achieved; safe for heavy vehicles and moving trucks
- 7+ days — Continuous moisture retention required during curing
What Does Driveway Installation Cost?
Cost by Square Foot and Project Size
Concrete driveway installation in the Fox Valley typically runs $8 to $15 per square foot for standard work with a basic broom finish. This includes excavation, base preparation, concrete placement, finishing, and initial curing. A standard two-car driveway of 600 square feet costs $4,800 to $9,000, while a larger 800-square-foot driveway runs $6,400 to $12,000.
These per-square-foot costs decrease slightly as project size increases because mobilization costs—getting equipment and materials to your site—get spread across more area. A small 300-square-foot driveway might cost $12 to $18 per square foot, while a 1,000-square-foot project could drop to $7 to $13 per square foot.
Decorative finishes increase costs substantially.
Stamped concrete adds $3 to $8 per square foot depending on pattern complexity and color choices. Exposed aggregate typically adds $2 to $5 per square foot. Both options require additional labor, specialized materials, and sealing that basic broom-finished driveways don't need.
Thickness also affects pricing. A standard 4-inch residential driveway works for typical passenger vehicles, but if you regularly park RVs, boats, or commercial vehicles, you'll want 5 or 6-inch thickness. Each additional inch adds roughly $1 to $2 per square foot because you're paying for more concrete and the additional strength usually requires a higher PSI mix.
Factors That Increase Installation Costs
Site access challenges drive up costs quickly. If concrete trucks and equipment can't reach your property easily, contractors need smaller vehicles, longer hoses, or even wheelbarrows to move materials. This increases labor hours dramatically.
Tight corners, steep grades, or limited clearance under trees and power lines all create access issues that add to the bill.
Extensive excavation needs—beyond the standard 10 to 14 inches—increase costs. Sites with large rocks, old concrete that needs removal, or unsuitable soil requiring deeper excavation and more base material cost more. Some properties need soil stabilization or additional drainage systems that aren't part of standard installations.
Your existing site conditions matter too. If your current driveway is asphalt or concrete, removal and disposal add $1 to $3 per square foot. Properties with significant grade changes might need retaining walls or extra base work to create a level surface.
Poor drainage often requires installing drainage pipes or catch basins before concrete work begins.
Permit costs vary by municipality but typically run $50 to $200. Some communities require engineering plans for driveways longer than a certain length or those connecting to roads. Your contractor should handle permit applications, but verify this is included in your quote rather than listed as an owner-supplied item.
Questions to Ask Installation Contractors
Start with base preparation specifics. Ask contractors to explain their excavation depth and base material choices for your specific property. They should reference your soil type and drainage conditions, not give generic answers.
Find out how they compact the base and whether they test for proper compaction or just make visual assessments.
Concrete specifications should be clearly stated in your proposal. Request the PSI rating, slump specification, and whether air entrainment and fiber reinforcement are included. Ask whether they mix these requirements into their standard bid or charge extra for upgraded mixes.
Reputable contractors specify these details upfront rather than treating them as upgrades.
Understand their curing process and timeline. Ask how they protect the concrete during curing and what weather conditions would cause them to delay or modify the installation. Find out when you can use the driveway and what restrictions apply during the curing period. This helps you plan around the installation and shows whether the contractor prioritizes proper curing.
Get details on warranties and what they cover. Many contractors offer a one-year workmanship warranty, but terms vary widely. Clarify what damage is covered—some warranties exclude cracks narrower than a certain width or issues caused by "settling" that's really just inadequate base preparation.
Ask about their process for addressing problems and whether warranty work gets prioritized or scheduled at their convenience.
Request references from projects completed at least two years ago. Recent installations often look fine, but problems from poor base prep or inadequate curing show up after a couple freeze-thaw cycles. Contact these references and ask specific questions about whether the driveway has cracked, whether the contractor responded to any concerns, and whether they'd hire them again.
Pro Tip: Always verify insurance coverage including general liability and workers compensation. Request certificates of insurance naming you as an additional insured for the project duration. This protects you if workers are injured on your property or if installation damages your home, landscaping, or utilities.
Frequently Asked Questions
- Wisconsin Department of Transportation. "602 Concrete Sidewalks, Driveways, Loading Zones, Safety Islands ...." https://wisconsindot.gov/rdwy/stndspec/ss-06-02.pdf. Accessed February 09, 2026.
- Wisconsin Ready Mixed Concrete Association. "Six Steps to Quality." https://wrmca.com/consumer/consumer-information/six-steps-to-quality/. Accessed February 09, 2026.